A few months ago I made the switch to solar power for my home. I’ve read so many articles by homeowners who had even done the install themselves. The difference was that I wanted to install solar panels on a flat roof and that difference would prove to be a big one.
I researched for hours upon hours to find an article, a video…anything to guide me through flat roof DIY installation of solar panels and came up empty-handed. Eventually, I did find a guide that I’ll share with you here. But first, I learned a lot more about the process I’d be undertaking.

So, how do you install solar panels on a flat roof?
- Get a professional roofing inspection to determine the condition of your roof.
- Layout all of the bottom rails.
- Connect floor rails with support rails.
- Place concrete blocks in the floor rails for securing.
- Mount solar panels.
- Wire panels one by one parallel to the mounting.
- Install edge plates.
Before we get going with the install, I want to share some of the information I found detailing why a flat roof install was so much more of an undertaking than working with a traditional style roof. Some of it came as a surprise to me. Let’s take the next few minutes to go over them.
What’s So Different About a Flat Roof?
A roof is a roof, right? Not in this case, apparently. There were loads of reference guides for installing solar panels on traditional roofs. Any mention of flat roofs and the articles got very tight-lipped on the topic, instead, making what seemed like strange warnings.
Writers would sing the praises about the ease of standard install and then basically issue words of warning for us ‘flat-roofers.’ Statements like: These panels can also installed on a flat roof, however, self-installation is not advised.
There were even blatant warnings suggesting that an inspector be called in first to do an inspection of the roof in order to insure safe installation. More than a few times, I was warned about potentially hazardous leaks developing in the roof. It was time to really determine fact from fiction and figure out how I was going to accomplish my task.
Is it Possible to Install Solar Panels on a Flat Roof?
In short, the answer is yes. A flat still has a minimal slope to it that will accommodate a solar panel system. Flat roofs aren’t really flat after all. These types of roofs are also commonly referred to as low slope roofs and low slope applications.
Now that I’d answered the most important question, it was time to look further into some of the other information I’d found Just like so many other things in life, just because you can, it doesn’t mean you should.
There Are a Number of Challenges When Installing Panels on a Flat Roof
The two most pressing factors in the design of a successful solar panel system that generates the maximum electricity are simple:
- Solar Panel tilt angle
- Solar Panel orientation
Once these two potions have been achieved you can expect energy performance from your system. Figuring these out can be a challenge based on position and geography.
Keep in mind also that only the top manufacturers provide warranties on panels installed at an angle fewer than 2 degrees. The warranties are out there, sometimes even completely justified in having, but you really should consider options before rushing to a choice.
There also is a higher risk of roof leaks or damage. When water pools up around the panels it can start compromising the integrity of the roof. You’ll need to d your best to establish the location that is the most level to avoid water build-up during rains.
In Addition, There Are Also Some Flat Out Disadvantages…
The more flush the panel lies to the rooftop, the more likely they are to get dirty and lessen the ability to absorb sunlight. Traditional roof pitches keep the panels positioned in such a way they are basically self-cleaning and don’t need to be wiped down. You will have to be diligent in keeping the panels on a flat roof clean and free of debris.
Not only are they dust and dirt magnets, but panels that are lying flat are not facing the sus much as panels tilted to the north.
You’ll also quickly learn that not every company is equipped to perform the installation on a flat roof. At this point in my information discovery, it was becoming abundantly clear where there was so little information on the installation process. I’m sure quite a few folks ran screaming long before that point!
Now that we’ve learned a sufficient amount about the potential pitfalls, let’s finally start working on getting them on the roof.
Prepping For the Install
There are just a few necessary precautions that need to be taken before we begin the install. Find a local professional roofing inspector to determine the condition of your roof. You’ll need to be sure that it is able to support the weight of the panels and the additional weight of angled mounts.
They will also be able to identify any other issues that may hinder installation such as low spots, plant growth or ‘alligatoring”. (Cracking in the surface of the roof that can weaken the structural integrity) Any issues will need to be addressed before moving on.
Getting Started With the Installation
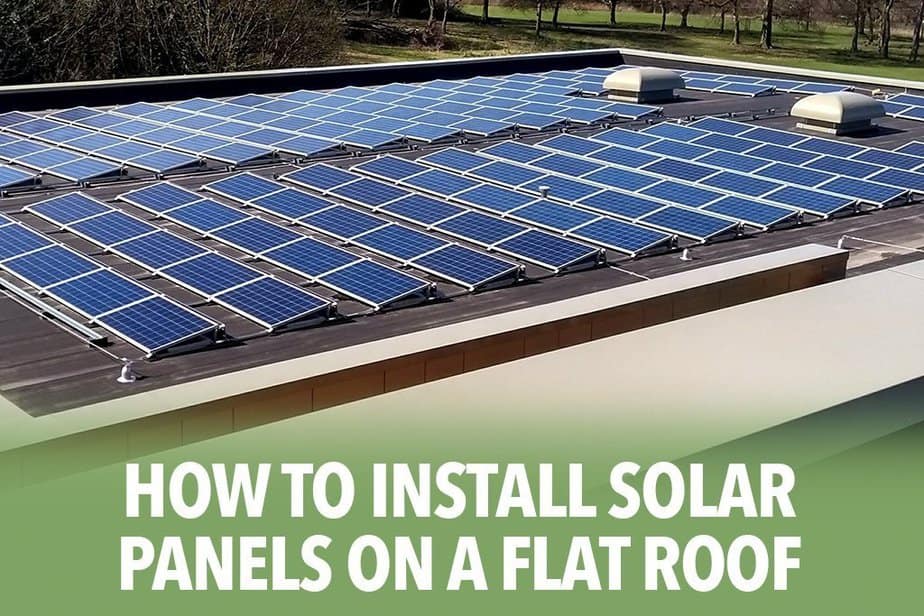
Now let’s get to it! We’re going to be mounting the system on a 30’ x 30’ flat roof using the Aero 12 mounting system by LORENZ. This system allows mounting to take place without drilling holes or clamping.
This article is owned by SolarPowerGenie.com and was first published on October 14, 2019
Step #1: Layout All of the Bottom Rails
The bottom surface of the rails is covered with a protective foam mat to ensure the metal does not touch the roof liner. Without this the metal heated from the un can push itself into the liner causing damage.
Each rail is equipped with a fold-out stand that is secured by screws into a vertical position. These stands can b adjuted in length to adjust the angels of the panels.
Step #2: Connect Floor Rails With the Support Rails
The solar panels will be mounted on these rails later. It’s imperative that all of the rails are laid out on the roof prior to any further steps are taken. Once these are installed, it’s not something you want to take apart and reassemble over and over. All that will do is cause the mounting kit parts to lose integrity.
Step #3: Place Concrete Blocks in the Floor Rails For Securing
In some cases, you’ll find some rails have additional spaces for concrete blocks for extra securing. The blocks are used as weights to anchor the rails, making it so we can secure all the mounting kits without drilling any holes into the roof itself. Unlike a traditional roof, there is a far greater risk for leakage when holes are drilled into a flat roof.
In my situation, we rented a telescopic wheel-loader in order to lift the material onto the roof.
Step #4: Mount Solar Panels
Place the solar panels on the pre-assembled rails and secure them with the brackets. We used 23 panels on my roof, all of them being REC 255 watt solar cells. These were also lifted with the assistance of the wheel-loader so as to avoid breakage.
Step #5: Wiring the Panels
The wiring is done panel by panel to the mounting. In my case, the cells were distributed over two string circles that are routed to the SMA converter inside the house. The converter feeds the electricity into the power lines of the house.
Unless you have a good amount of electrical wiring experience, this is probably something you should outsource. This list here is a great place to start finding one near you.
Step #6 Install Edge Plates
Once the panels are completely mounted, install edge plates on the beginning and end of each row. This gives an aerodynamic effect to prevent the wind from grabbing underneath the solar panels.
Final Thoughts and Additional Resources
Finding all the information to do this kind of job was not easy. The steps I have outlined above are very general and in no way consist of the entire process of flat roof solar panel installation. Just like every resource I found, I would advise you to seek the assistance of a professional. If you’d like to see a tutorial of what I’ve described, here’s a great video posted on YouTube by someone with more expertise than myself.
Title photo by Pete
Related Articles
How to Find Out if Solar Panels are Too Heavy for Your Roof?
How weather resistant are solar panels
6 Factors That Affect Solar Panel Output
Which Direction Should Solar Panels Face?
This article is owned by SolarPowerGenie.com and was first published on October 14, 2019